
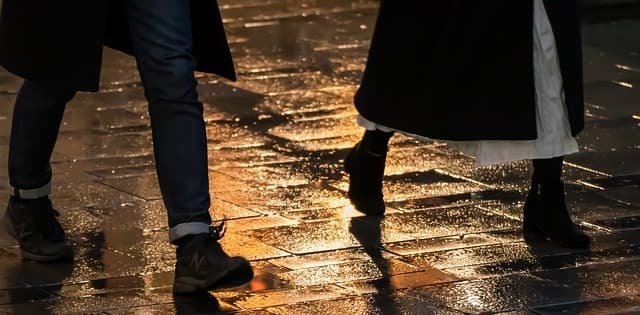
Winter and spring are here, with snow and rain in the forecast. While our plants and trees need to drink up the moisture, our leather boots do not.
The question begs, “how do I waterproof my leather boots?” Made from the skin of cattle, sheep, pigs, or goats, leather is a natural material full of oils. When it gets wet and then subsequently dries, the oils escape. The leather is left dry and at risk of cracking. What once was soft and luxurious now is left brittle and misshapen.
Why allow this to happen to your boots when it is entirely preventable? By understanding where leather comes from and how to protect your leather boots, you do not need to ruin pair after pair.
Waterproof versus water-resistant
While used interchangeably, there is a difference between waterproof and water-resistant. Water-resistant material naturally repels water from the surface but only to a degree. Think of this as the lowest level of water-repelling ability. While a slight drizzle may be dismissible, any amount of time will ruin the material. Once the leather is made water-resistant, any spills should be wiped off so as not to allow them to soak into the leather, causing more permanent damage.
On the other hand, waterproof theoretically repels water indefinitely, but that is not exactly true when it comes to goods. According to REI, there is no set standard on when something repels water “enough” to be deemed waterproof. So while a jacket may be considered waterproof if it repels enough water, a watch or iPhone likely have a different set of standards. Per HiConsumption, “the difference between what’s water-resistant and what’s waterproof isn’t a defined line, but rather a sliding scale.”
Are leather boots waterproof?
This question is where the issue with calling an item waterproof. As a naturally porous material, leather is permeable, meaning it is capable of absorbing some of the water. If you walk through a wading pool with leather boots on, waterproof or not, they are going to suffer. That said, you can absolutely treat the leather to make it more capable of standing up to the effects of water.
How is leather made?
By understanding the breakdown of leather, it becomes easier to recognize the delicate nature of the material. A synthetic material such as plastic allows for more durability, but leather has a process to its creation. Appreciating the process lends one to intrinsically want to preserve the supple material.
What is the hide?
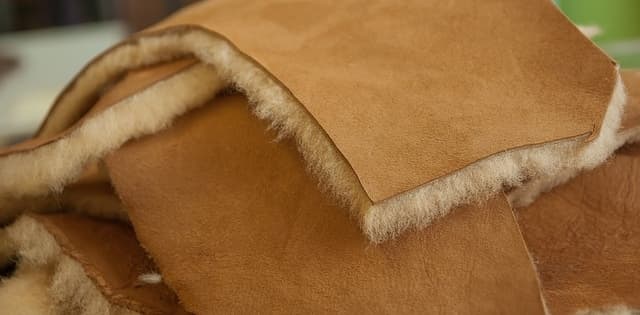
Let’s start at the beginning. Tanners create leather from the skin of an animal. While this can be procured from a wide variety of animals, most of the leather used in commercial products are made from cattle, sheep, goats, equine animals (horses, mules, zebras), buffalo, pigs, and aquatic animals (seals, walrus, alligators). Leather boots are often made from cattle, mainly calfskin leather, as the leather has a tighter grain and fiber, meaning it will repel water more efficiently.
On smaller animals, the skin used is simply referred to as the skin. With larger animals and a wider skin area, this cut is referred to as the hide. The hide is composed of three layers: the epidermis, the corium, and a fatty layer. Imagine a sandwich: the top slice of bread would be the epidermis. The filling inside is the corium, leaving the bottom piece of bread as the fatty layer. When making the leather, the bread is removed, and only the thick corium layer is used.
When the corium is made into leather, it frees the hide from the ability to decay. Acids, salts, bases, enzymes, and tannins are used to dissolve fats and nonfibrous proteins while creating a stronger bond between the collagen fibers. The process of creating this non-decomposable leather from a hide is called tanning.
The leather making process
Initially, to turn the hide into leather, the skin or hide was placed in the sun to dry. To ensure the material did not dry out, animal fats and brains were pounded into the skin before being preserved with salts and by smoking. Today, some hunters still use the animal brain method to create leather, paying particular attention to stretching the leather in the process.
Around 400 B.C.E., plant tanning, the slow method of using tannins in bark and leaves, was introduced to the leather making process. Egyptians and Mesopotamia used the bark of a gum arabic tree called Acacia nilotica. This method produced a stiff leather. Other tannins used were chestnut, mimosa, bark, sesame oil, and mineral alum.
In the middle of the 19th century, machines replaced humans for much of the splitting, dehairing, and fleshing. By the end of this century, the process of chemical tannage was introduced. This method came with environmental consequences and would no longer be accepted today. Most of the leather making factories were located by rivers or waterways, polluting the ground and water, destroying trees to create the leather, and exposing employees to the chemicals used in the process with no regulation or oversight.
Modern leather making process
Today, the process follows a series of steps: preparation for tanning, tanning, and processing. Before the process begins, the hide is delivered to the tannery before it decomposes. A dehydration process utilizing air-drying, wet or dry salting, or pickling with acids and salts preserves the hide.
Preparation for tanning
When the hides arrive at the tannery, the added salts and acids are removed by soaking the hides in water. When sufficiently restored to the original shape and condition, a lime mixture of lime or calcium hydroxide and sodium sulfide further soaks the hides. This process is called liming and is done to soften the hide and loosen the hair, epidermis, and tissues later removed by machine.
The final step of preparation is rinsing the lime away, bating (removing nonfibrous protein to enhance the color of the hide), pickling (a final cleaning and improving the softness), and splitting (separating the grain). Splitting the leather allows to top grain of the hide to be separated from the bottom grain for various uses.
Tanning
After preparation for tanning, the hide is now ready to be changed from pre-leather into usable leather. The hides are soaked in large drums of solution, becoming increasingly stronger in liquor. These dehydrate the hides and replace the water molecules. The tannic acid solutions are a variety of compositions, but the four solutions below are typically seen in the leather making process.
- Pure Vegetable Tanning
- Chrome Tanning or Synthetic Tanning
- Oil Tanning
- Combination Tanning
Most leathers used for boots utilize vegetable tanning, chrome tanning, or a combination of the two. Vegetable tanning takes a long time, requiring 30-60 days or even up to a year for the leather to be ready. This process is long and expensive, but the shoes tend to last a much longer time… up to a decade of heavy wear. These shoes are stiffer, but in time, mold to the wearer’s foot.
Chrome tanning is a quicker process and accounts for near 90% of the world’s shoes. Instead of vegetable tanning, chrome tanning uses chromium(III) sulfites. The leather can be tanned in a day, is stretchier, and can easily be dyed. Because of the chemical breakdown of the hide, the leather is thinner and crack easier. In turn, the lifespan of the boot likely decreases. Unfortunately, also, this method comes with an environmental cost. The vats of chromium sulfites are often dumped into local waterways. This is not to say every tanner disregards the environment.
Oil tanning takes chrome tanning a step further by also infusing the solution with oil. The result is a more water-resistant product. The upkeep on this type of boot is lessened due to the process. Combination tanning takes the best of both worlds, combining the process for durability and a faster turnaround. If you prefer a specific tanning method and end product, it is worth the research on which brands utilize which form and the environmental impact of each.
Processing tanned leather
The leather is dried thoroughly during this stage, and then dye is added by drum dyeing, spraying, brush dyeing, or staining. Excess water is removed from the hides, and they are shaved to achieve uniformity in their thickness. The dying process and any re-tanning necessary to modify the physical appearance of the leather is then performed.
Oils and greases may be adding to the leather to add softness, strength, or additional water repellency. Excess water is removed mechanically, and the hides are stretched and dried via air or tunnel drying. Paste or vacuum drying may also be used for drying, although they are not as prevalent. The leather is treated one more time to help give it resistance to cracking. Finally, the hides are trimmed and ready to be used for their future purpose.
Steps to waterproof leather boots
So now that you know exactly how complicated the process is to turn leather from a hide off an animal to the material on your boot, it makes logical and responsible sense to treat that creation with the care it deserves. How we do this either preserves your investment or paints you with as much disregard as those tanners dumping chemicals into local waterways.
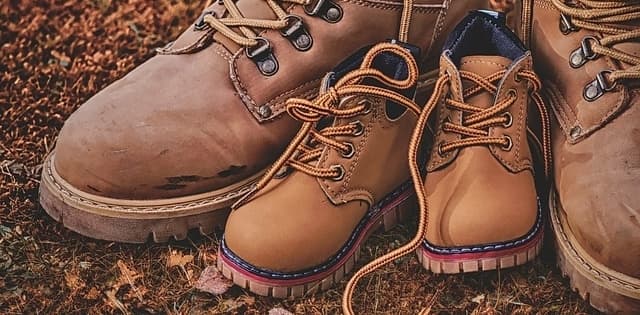
Step 1: know what your boots are made of
Before you start applying wax to your boots, make sure you know the material you are working with, so you do not accidentally ruin your shoes. Full-grain leather needs a different treatment than suede, which is a much more delicate leather. Check the manufacturer’s website for details for your boot’s leather type.
- Suede: created by splitting, suede is the innermost layer of the hide. Do not use wax, as it will change the appearance. This leather needs a specific spray.
- Nubuck: created when the hide is sanded, resulting in a durable, suede-like texture. Use a spray for waterproofing.
- Synthetic: although seemingly would be waterproof, this type still needs wax or spray
- Full-grain or top-grain: although the most naturally waterproof, this quality of leather still needs wax or spray to maintain the leather
Step 2: clean your boots
Make sure your boots are as clean as possible. Any residue, such as dirt or mud, can create a barrier between your waterproofing agent and the boot. This is the equivalent of leaving tape on your wall when painting – the paint cannot go through the tape.
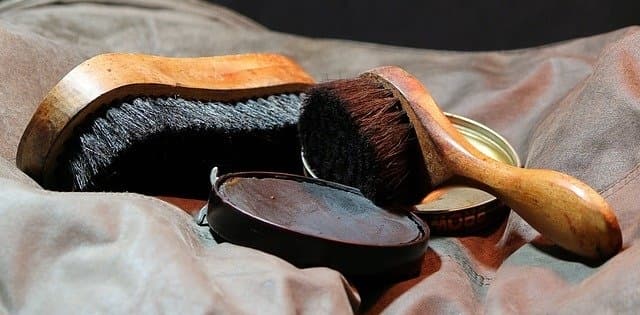
To ensure the cleanest boot possible, remove all the laces from your boots. Using a brush intended for cleaning shoes helps to get hidden or stuck dirt off your boots. Popular choices are horsehair brushes or synthetic brushes. You may need to soak the soles of your boots if the mud is cacked on, being intentional not to let the leather soak as well. Spray off any residue, if needed.
If working with suede, do not spray your boots. Instead, follow a similar method with cleaning your boots with a brush. Stuff the shoe with tissues to hold shape and use a suede cleaning spray all over the suede. Any untreated spots will appear uneven later. Then, allow the boot to dry overnight, noting they will lighten as it dries.
Let your boots air dry but not dry out. Leaving the boots slightly wet allows for better absorption of the product into the boot. You can stuff newspaper into the boot to keep shape during the drying process.
Step 3: chose the proper treatment
As stated earlier, depending on your leather type, you will need a wax, a spray, or a cream. Keep in mind treating your leather may leave your boot with a darker appearance. Despite the chosen method, ensure your entire boot is covered, and seams or any place the leather may bend is given enough attention to ensure they are protected, also.
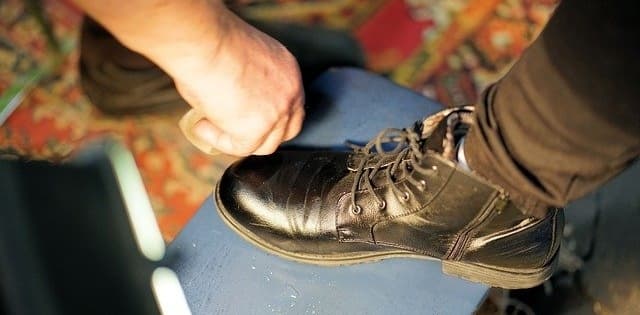
Wax
To prepare the wax so it is pliable, warm it slightly for ease of use. You can do this by using a hairdryer on the wax. Apply the warmed wax to the boot using a clean, lint-free cloth. Wipe off excess wax and allow the boot to dry for 30 to 60 minutes. Buff the boot to achieve a shine. While this method takes a bit of work, the advantage is you can reach the cracks and harder-accessed areas of the boot.
While some sites suggest treating suede with wax to increase its water resistance, you must understand that wax will change the boot’s texture and potentially leave an uneven look.
Sprays
Sprays are best held about 6″ away from the boot. Ensure the coat is even and thin. Some brands require a second or even third coat of spray and are often specific to the type of leather. Check details on your can before use.
Cream
Similar to wax, apply cream to the boot with a clean, lint free cloth or the applicator that comes with the boot. Work the cream into the leather, paying attention to cracks and often hidden areas.
Step 4: drying the Boot
After cleaning and applying treatment, now you wait. The boot must thoroughly dry before you use it. Do not rush this process by applying direct heat or placing the boot in direct sunlight. By utilizing something like a hairdryer or sitting the boots next to a heater, you risk loosening the glue or causing cracking. Simply let the boot dry. If you are trying to rush the process, ball up a newspaper and place it in the boot to absorb moisture.
Step 5: repeated treatments
Do not think of your boots as a one-and-done application. You would not wash your car one time and expect it to last its lifetime. Repeat cleanings and treatments are necessary; after all, this is an investment.
How often you treat your boots depends on the extent of wear and how often you use your boots. Watch the way your boots react to water. Is the water beading off the boots? If not, time to retreat them. Did you find yourself unexpectedly in a muddy field? Take the time to redo the process. Inspect your boots. If you find they are becoming stiff or cracked, condition the boots again. For some, this breaks down to every few months.
Step 6: consider conditioning
If you applied wax but the boots still seem stiff, this is likely because wax itself does not condition the boots. Keep in mind, the more you condition your boots, the less they will hold up. Be weary to not over-condition. Conditioning your boots helps prevent cracking and keeps your boots from becoming too hard… you just don’t want them to become too soft unintentionally.
Your boots need to be wet for proper conditioning. Do not soak the boots. Just make sure they are damp. Essentially, when the water evaporates, the conditioner will take its place by soaking deeper into the boot.
Rub the conditioner into the boots. You can use your fingertips or cloth, but if you find a cloth limits hard to reach places, switch to your fingertips or a gloved hand. Remove excess conditioner and allow to air dry.
“I did not waterproof my boots, and they are wet”
This can be a moment of devastation. You just purchased a beautiful pair of boots and got caught in a soaker, now left with drenched leather and a gut-wrenching worry you ruined your investment. Before despair – there is still time to fix your boots!
First – move quickly. Do not stuff your boots into a closet to deal with another day. While they are still wet, stuff them with newspapers to hold their shape. Wipe off or towel dry any standing water still on the boots, and then allow them to air dry, but not to the point of being completely dry.
Condition the boots by rubbing leather conditioner into them. Leave them to sit for several hours or overnight to absorb the conditioner. This will help replenish the lost oils from the soaking. If the boots still seem dry or cracked, reapply condition to needed areas.
Once the boots seem restored, apply waterproofing spray. A one-off accident happens, but to repeat it is to risk losing your boots’ quality for good. As the quote says, “An ounce of prevention is worth a pound of cure.”
Clean and store your boots properly
Now that your boots have been treated, take time for regular upkeep. After wearing your shoes, use a damp cloth to wipe off the grime. This simple action helps prevent buildup and staining. Store your boots at room temperature and away from sunlight. Extreme weather and the constant sun will cause your leather to age and potentially shrink.
Homemade shoe treatments
You can purchase numerous name brands, but in a pinch, you may find yourself needing to mix up a batch of your own solution. Before applying the treatment to your boots, test it in a small, inconspicuous place to ensure the solution will not ruin the leather.
Buffalo Jackson lists ingredients for a homemade leather conditioner and a leather wax on its website. Workgearz claims regular hair conditioner works for leather, but they also give household solutions for cleaning your leather boots, such as vinegar for salt stains and toothpaste for scuff marks.
Types of Boot leathers
When you explore the various leathers to buy and commit to waterproofing, it helps if you know what the terms represent. Let’s quickly examine some variations of boot leathers.
Roughout Leather
This is a popular military and mountaineer boot. The style is a work boot and does not require a lot of maintenance. The leather is made from the underside of the hide’s grain, leaving most of the grain intact, attributing to its low upkeep. These boots are intended to take a beating.
Veg-Tanned Leather
As explored earlier, veg-tanned boots are boots using vegetable tannins and tree barks. These boots are great for casual wear but are vulnerable to shrinking and stiffening if they get wet. The boots may darken over time. Some people prefer this boot when considering the environmental impact of using chrome.
Pull-up Leather
Pull-up leather refers to the finishing of a boot. Usually, the boot is a “top-grain” leather. During the finishing, the technique infuses hot wax and oil into the hide. Because of the method, lines are visible when stretched, appearing a bit two-toned. What this finish yields is a boot that is lower maintenance and handles scrapes and scuffs well. This boot is found in business casual or daily settings. The boots should be conditioned a few times a year.
Suede
Suede is delicate and has been buffed and sanded, resulting in thin, fragile leather. Many suede boots are intended for warmer weather, such as summer and early fall. While suede is gorgeous, it is high maintenance. The boot will not tolerate rain well and tends to soak up liquid. Because these boots come with a significant probability of being compromised, it is imperative to plan on treating your suede often and before wear.
Click Here For How to Clean Water Stains Off Suede Shoes and Boots
Genuine, top-grain, and full-grain leather
These terms are often floating around leather shops. Knowing the difference ensures you get the type of boot you want versus the one the salesperson is pushing to sell.
Genuine leather, while sounding high quality, is the bottom of the three types. This leather is often low-priced and rightfully so. The leather is made with a variety of layers of leather bonded by glue.
Falling in second place for quality is top-grain leather. When the leather is split, this part is then sanded to smooth out imperfections. While it has a beautiful, uniform color, it will not produce a long-lasting boot.
If you are looking for long-lasting quality, full-grain leather is the boot for you. This leather is by far the strongest and toughest of the grades. Because the process includes using the entire grain of hide, just below the hair, imperfections will show, but the quality will outperform the others. It typically is a bit more expensive but will last a much longer time. Because the grain is so tight, its natural “waterproofing” quality is higher to start.
Find your boot and treat it well
The type of boot you chose solely falls upon what you are looking to achieve, your budget, and your personal preference. Like the Swiss psychologist and psychiatrist Carl Jung said, “the shoe that fits one person pinches another; there is no recipe for living that suits all cases.” Despite the type of boot that works for you, make sure you treat it right by waterproofing it to last through life’s unexpected moments, and then carry on, living by the mantra, “these boots are made for walking…. And that’s just what I’ll do.”